
Adding Content to Your Pressbook
First Things First
To log into Pressbooks, paste the URL of your book into the address field of your browser, for example: https://psu.pb.unizin.org/yourbookhere/
This way you will log into the PSU instance of Pressbooks.
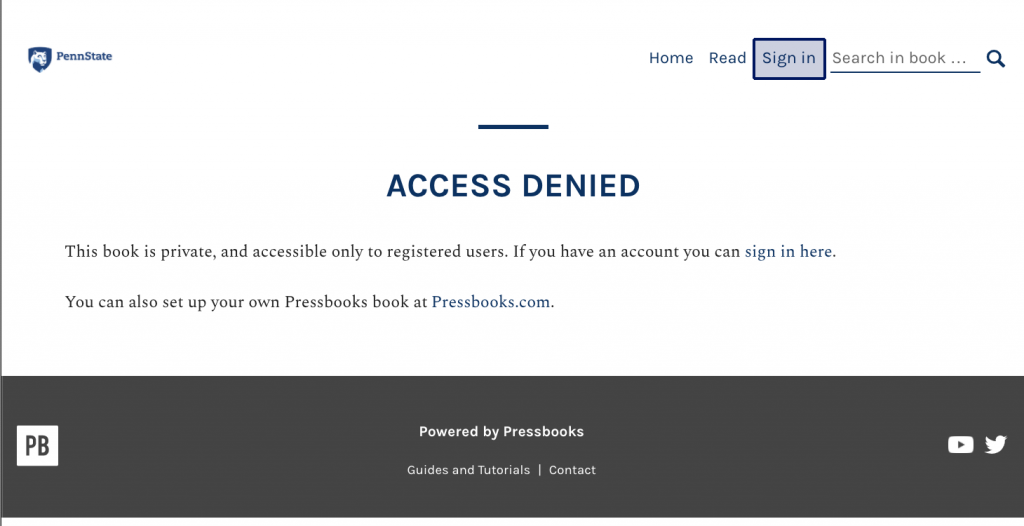
If you try to log in to the Pressbooks Website rather than Penn State’s instance of Pressbooks, you won’t have access to your book.
Click on the Sign In button in the upper right which will take you to the Pressbooks login.


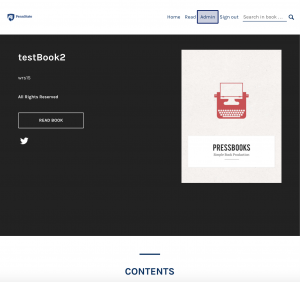
Login and you will be taken to your book’s Home page.
From the Home page, click on the Admin link in the upper right which takes you to your book’s Dashboard.
From the Dashboard, you can access a user’s most frequent tasks, including creating a new book, cloning a book, editing your book’s information, organizing chapters, managing book users, and more.
.

Below we will discuss the Organize page.
Organize
The Organize page is a one-stop shop for all your content structure needs which includes adding, deleting and rearranging:
- parts
- chapters
- front matter (introductions, acknowledgements, etc)
- back matter (appendices, glossary, index)
Paradigm Shift
Traditionally when you think of a book, most think in terms of chapters and pages. Pressbooks thinks in terms of Parts and Chapters. For inner peace and harmony, repeat:
- Parts = chapters
- Chapters = pages
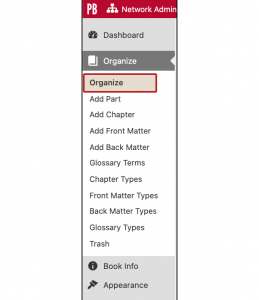
How to get to the Organize page
Click on Organize near the top of the Left Sidebar Menu.
The Organize page
The Organize page gives you an overview of your entire book and is an easy way to access and then edit all of your book’s Parts, Chapters and Front and Back Matter.
This is also where you can set your book to be “Private” or “Public” at the top of the page.
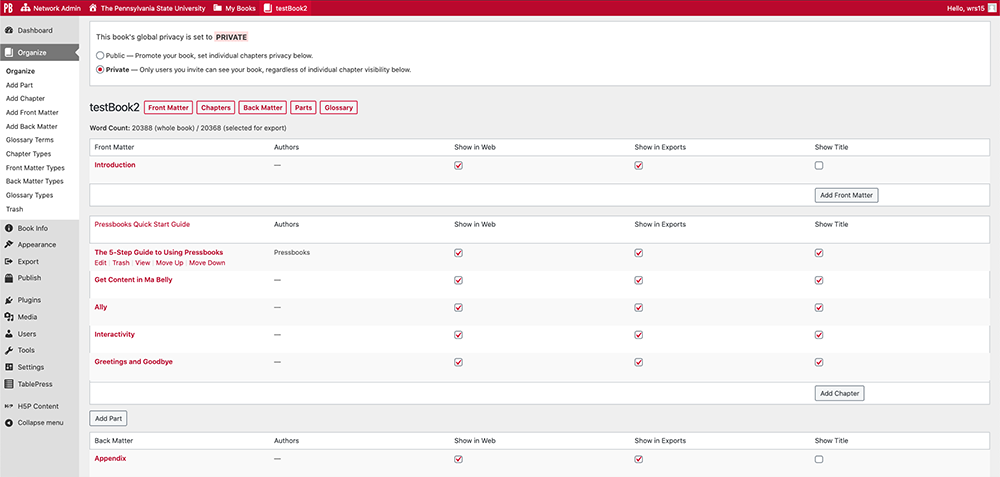
Hovering over Parts in the left column displays options of:
- Edit: takes you to the Editor
- Trash: deletes the Part; but the chapters from that Part will now appear at the end of the 1st Part. NOTE: there is no warning… no “Are you sure?” to confirm. However, the Part will be moved to the Trash, where you can Restore it for up to 30 days.
- View: takes you to what the Part will look like viewed on the web
Hovering over Chapters in the left column displays options of:
- Edit: takes you to the Editor
- Trash: deletes the chapter. NOTE: there is no warning… no “Are you sure?” to confirm. However, the chapter will be moved to the Trash, where you can Restore it for up to 30 days.
- View: takes you to what the chapter will look like on the web
- Move Up/Move Down: rearranges the chapter
While clicking on the trash is unforgiving, there is a 30 day grace period.
Adding Content
Whether you’re adding content to chapters by entering directly via Pressbooks’ UI, cut & pasting from documents or importing from a website or document, the majority of your time will be spent in the Editor.
The Editor
Previously we mentioned a couple different ways to enter the Editor. Via the Organize page you can hover over a chapter and click Edit, or you can go to the top of a chapter/page and click the Edit box. Both methods take you to the Editor where you will either be in the Visual (WYSIWYG) editor or the Text editor (HTML). You can switch between the two via the tabs on the right.
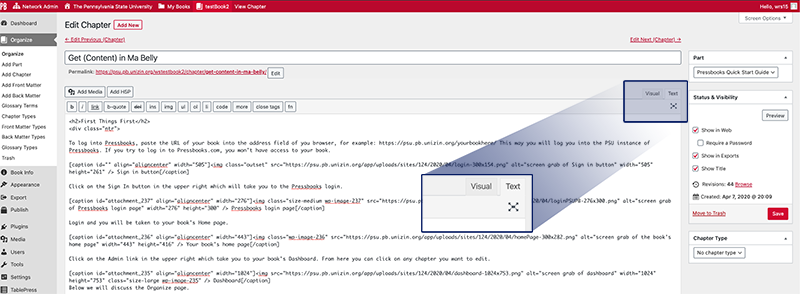
If you can create Word docs, you can use the Visual editor which has an interface similar to popular text-editing environments. If you’ve worked in HTML, then you’ll be comfortable in the Text editor.
Save
Click the red Save button in the right panel when you are done editing to save your changes to your chapter. You can then view your changes by clicking the View Chapter link in the red bar at the top.
Save often! You can always revert back to a previous version: Note the Revisions area at the bottom of the editor.
Tips & Tricks for the Editor
Attribution Information
- When you find an openly licensed image that you want to use, make sure to record the TASL information (title, author, source url, license). It is so much easier to capture this information when you first find the image as opposed to later when you are ready to publish and have to re-find the image to access the url.
Strange Text Editor interface quirk
- If the Editor “jumps/scrolls” to a different part of your chapter’s content leaving you lost while in the Text Editor, holding down shift and hitting the Up Arrow cursor key on your keyboard will return you. This happens mostly after using the Return key.
Triple clicking
- Triple click to select an entire paragraph before you switch from the Text editor to the Visual editor and vice versa. This gives you an easy way to locate your cursor position in the editing field.
Importing from website yields html mass
- Often importing gives you all the html in one bunch/mass, but if you go into the Visual editor and then back to the Text editor, the html will be structured/formatted for easier editing.

Multi tabs
- Use 1 browser tab for your Editor, 1 tab for View Chapter. Then after a Save, a screen refresh is all you need to see your edits on the View Chapter tab. You can even use a separate tab for Media Library.
Visual tab erases html
- Be aware that the Visual editor will erase certain HTML that you’ve added especially for lists and additions.
Import
Importing is the preferred method of adding content, because the process will retain the formatting styles of the source plus it will import imagery and its ALT text into the Media Library. We want our imagery in our Library so we don’t have to rely on external websites. You can import from the different types of resources listed here:
- EPUB
- Word doc
- OpenOffice
- Pressbooks/Wordpress
- Webpage
The Import command can be found in the Left Side Panel/Tools/Import.
Cut & Paste
This is a tried-and-true method of getting content into your Pressbook chapters when importing won’t work. You can cut & paste from Word docs, PDFs, Excel… just about anything, but formatting and styling can be altered or ignored plus imagery won’t be placed in your Media Library.
Media Library
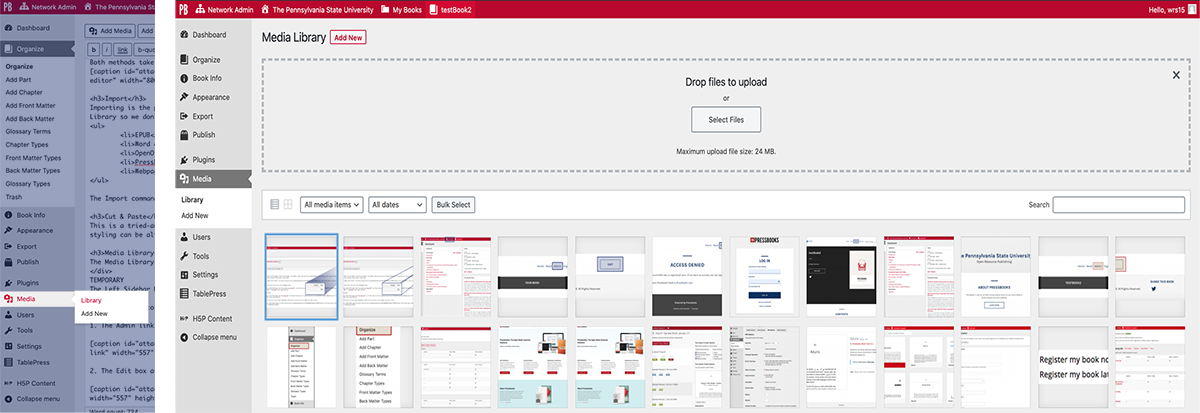
The Media Library can be found in the Left Side Panel/Media/Library and is where you add all imagery and audio files that you want to use in your book. Click on the Add Media button at the top left of the Editor to bring imagery into your chapter.
Note: Pressbooks recommends using Youtube or Vimeo for videos by either linking to them or embedding them in your chapters.
