3 Record Your Presentation Using PowerPoint (MAC)
The following instructions explain how to add audio to your PowerPoint presentation on a Mac and export that PowerPoint as an MP4 video file.
- Open your presentation in PowerPoint.
NOTE: PowerPoint online does not support recording a slideshow. You must record in the desktop application. - Click the Slide Show tab.
- Click Record Slide Show to start recording narration for a slide.

NOTE: If you are working with only one monitor (laptop with no external monitor connected), the PowerPoint will go into full screen in presenter mode, allowing you to see your presentation notes and timings. If you are using more than one monitor, one monitor will display the presentation slide in full screen and the other will display the presentation screen in full screen.
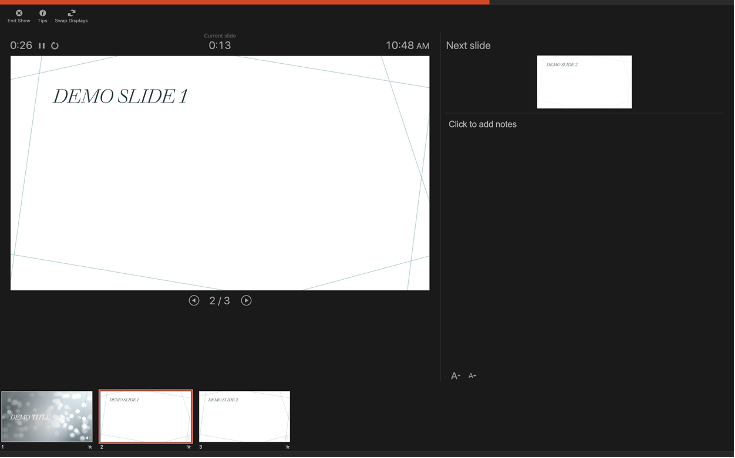
- Click the Play button to begin recording.
NOTE: Audio may start recording automatically. - Record narration and avoid reading text on the slide out loud to viewers.
- Click the advance button to record the narration for the next slide.

IMPORTANT: Stop speaking for a second to prevent the audio from cutting out as slides change. Resume speaking when the time starts moving again under the Current slide timing feature.

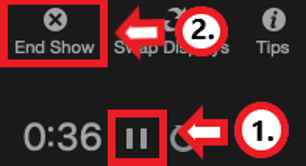
- Click Pause and then End Show when all the audio recordings have been finished.
- Check the audio by clicking on Play from Start under the Slide Show tab or the presenter mode icon at the bottom of the screen.
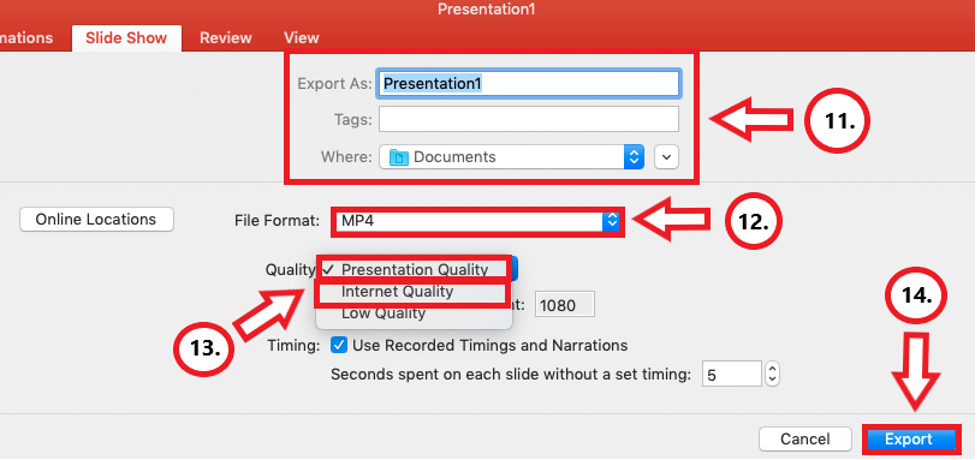
- To save the PowerPoint as a video, click File and then select Export. We also recommend saving your file as a regular PowerPoint before following the next steps for exporting your PowerPoint.
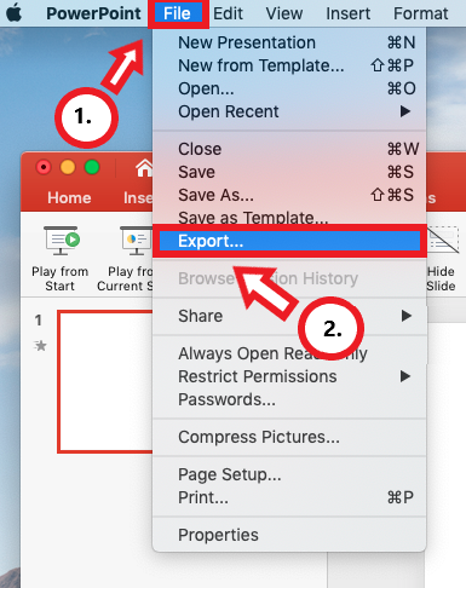
- Steps 11-14 are shown in screenshot below.
- Fill out text boxes (Export As, Tags etc.) follow PowerPoint’s prompts.
- Select MP4 from the File Format options list.
- Select Presentation Quality or Internet Quality. Presentation Quality will take longer to export.
- Click Export.
- Monitor the progress indicator at the bottom of the screen for when the video is no longer exporting.
NOTE: PowerPoint does not give an indication of how long the video will take to export.

Elaboration on the Recording Features:
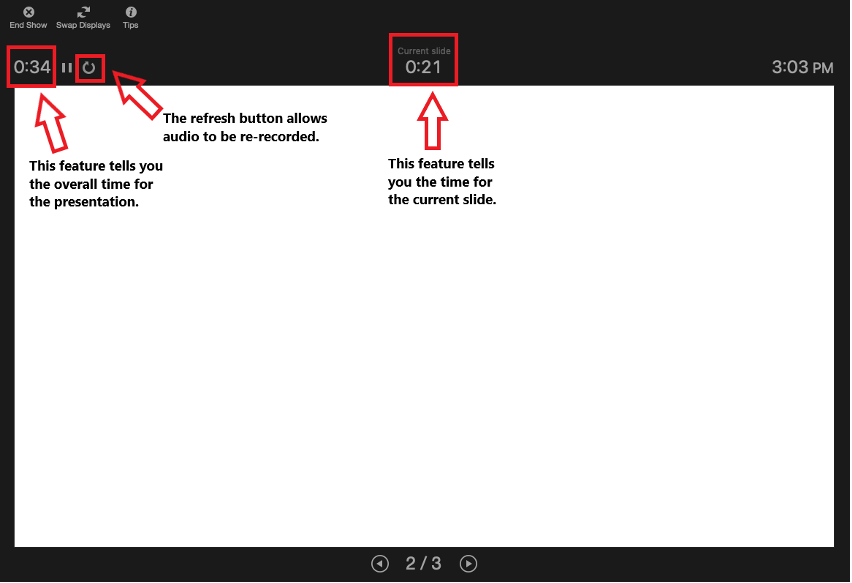
- Timing Feature – there is a rolling time feature for the individual slide and the overall presentation. Allows the presenter/speaker to keep an eye on how long they are talking.
- Seconds spent on each slide feature – Used for when a slide does not have audio, this is why it’s recommended to have audio on each slide. Re-start the audio for a slide by clicking the refresh button.
- Refresh Feature – Re-start audio recording for a slide by clicking this button.
NOTE: Audio starts recording automatically when this portion of the application is first opened. - Don’t set the camera to record – Make sure this button has a diagonal slash through it to avoid the problem.
- Re-record individual slides by selecting the desired slide and clicking Record Slide Show to start again.
NOTE: Make sure to click Pause and then End Show when the slide has been re-recorded.
