
9 Lab 06: Gait
Lab 06: Gait: Assistive Devices, Gait Patterns and Gait Training
Gait: Unit 1 – INTRODUCTION
Unit Objectives
Assistive Devices:
- Identify various types of ambulation aids.
- Describe the advantages and disadvantages of various types of ambulation aids.
- Properly fit an assistive device for a patient to promote safety, efficiency, and comfort during ambulation.
- Recognize safety factors while using assistive devices
Gait Patterns:
- DESCRIBE AND PERFORM the two-point, modified two-point, four-point, three-point, and modified three-point gait patterns on level surfaces, uneven surfaces, curbs and stairs.
- Describe the ADVANTAGES AND DISADVANTAGEs of the different gait patterns.
- Competently demonstrate the INSTRUCTION of gait patterns using appropriate equipment based on various conditions
- Describe the purpose of pre-ambulation procedures and ambulation
Gait Training:
- Correctly describe the level of assist required for safe gait activities.
- Recognize how to SAFELY GUARD a patient during gait training.
- Safely and effectively implement interventions for gait training and use of assistive devices for common patient/client conditions.
- Provide education on the safety factors involving transfers, gait, and assistive devices as directed by the physical therapist plan of care?.
Introduction:
Welcome to what just may be the most fundamental of all “PT Skills” – Gait training. While volumes have been written on this topic, this semester, we will only be wading into its shallow waters: We will just be looking at gait training for patients with orthopedic conditions. As your knowledge of neurological and medical diagnoses grows, however, you will soon appreciate how deep these waters flow. For now, however, let’s just get our feet wet.
While up until this point in your life, it is possible you may have taken your ability to walk for granted. Like most of our innate abilities, we do that. Well, until that ability is taken from us. When it is, we feel…
REFLECTION BOX:
Imagine for a moment a loved one, your parent, friend, significant other, asked you to join them for a weeklong vacation. A week filled with all of your favorite activities. The day before you are to leave, you are in an accident and injure your leg such that you are confined to a wheelchair for the next week.
Your loved feels so sad, but, well, since they have bought the tickets and all…. they decide to take someone else and off they go. After a few days pass, you alone in your home, you realize they are not even keeping in touch with you (too busy having fun). Because you cannot walk, you are not even able to engage in activities in the local community or even your home.
How might you begin to feel? Towards yourself? Towards your loved one? Towards your friends who are too busy to come visit you. Towards the situation?
Perhaps you felt anger, sadness, anxiety, resentment, confusion or any number of other emotions well up inside you. Think for a moment how those emotions might affect your ‘behavior’. Might they impact your sleep, your relationships, your willingness to engage with other parts of your life? Perhaps losing just one ability isn’t really just losing one ability – maybe it just might impact many of your abilities as well as your sense of yourself.
So, when you have the opportunity to provide gait training and gait training activities, you’re your patient, you are not just ‘getting them walking”, you are returning to them a great gift. They may never tell you that, but know that in the story of their life, you were a main character in a difficult chapter.
PART I: ASSISTIVE DEVICES: Why, What and How.
Why?
REFLECTION BOX: The WHY?
Before we can make sense of assistive devices for gait, we need to first ask ourselves: “Why would someone need an assistive device (AD) anyway?’ If we know ‘why’ someone needs the AD, then we can better select the correct device.
Take a moment: What reasons might a patient need an AD to help them walk?
What did you come up with? Maybe you thought of someone who could not put any weight on their leg. Let’s think about that: Maybe they had an ankle fracture. If so, they cannot put weight on their foot. Without an AD, they would need to hop around on their one ‘good’ leg. Maybe not the safest way to get around the house; certainly not the best way to leave the house or go into the community. However, if that person were to use an AD that provides lots of stability, they could safely get around. Any ADs come to mind?
On the other hand, maybe you have a case of mild case of vertigo and need just a ‘little’ support. In that case the best AD is one that provides support, but lots more ‘mobility’ than ‘stability’. (This principle will make a bit more sense by the time we finish this section).
For now, let’s first look at some of the more common reasons a patient may need an AD. We will use the term “impairments” to refer the functional losses of ability that occur due to an injury, illness or surgery. At this point, though, you may be wondering how you will determine a given impairments severity. Good point. Fortunately, we in the world of PT, have created many objective assessments and tests to measure the severity impairments.
The objective, measurable data we gather from these tests allow us to document the severity of an impairment when we first encounter the patient. This also allows us to repeat the test later during the course of their time in PT to assess how the patient is responding to their treatments in PT. Next semester, you will be learning how to measure strength as well as range of motion (ROM). These two metrics (objective units of measure) will allow you to see improvement, or the lack thereof, before and after your treatments.
To summarize: As a clinician you be using objective tests to monitor your patient and, as needed, modify/adapt your treatment intervention to best fit the needs of your patient. This brings us back to the common impairments that impact gait – and your role in selecting the most appropriate device.
- Balance:
- Coordination:
- Endurance
- Strength
- Flexibility (Range of Motion: ROM) of an extremity or extremities.
- Absence of an extremity
- Vision
- Bone integrity during fracture healing
- Pain
WHAT: Now that we have an idea of the common reasons someone may need a device to help them safely ambulate, we can now look at the devices that we use….this will answer the question, WHAT are the ADs we use?
We will begin with the most stable and progress to the most mobile (allowing for ease and speed of movement)
- Parallel Bars. Considered to be the most stable form of assistance for gait training, parallel bars will vary in length and style. However, they typically adjustable in height and width allowing the therapist to adjust the bars to fit the needs of the patient.Can you think of reasons why a patient might need this form of AD?
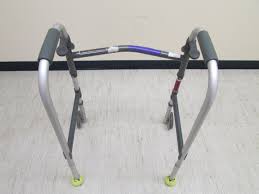
- Walkers.Walkers vary greatly in style and, consequently, vary in the amount of stability / mobility they offer.
- A standard walker (sometimes called a ‘pick-up walker’) provides the patient a good deal of support. In a way, you could think of this type of walker as a movable parallel bar. The patient will advance the walker first, then, when all 4 legs of the walker are securely on the floor, advance the involved LE (the injured/painful or weak LE) first. They are now able to bear down on the walker (to unload their hurt LE) as they advance their non-involved LE.As you would imagine, though, the patient will ambulate slowly when using this device. What gives great stability often limits speed / ease of movement…mobility.Patient’s use this device when they have a weight bearing restriction on one of their LEs.
- Rolling walkers come in different flavors. The typical rolling walker has two wheels on its front legs. They may be fixed (they do not move side to side or swivel around) or swivel (just as the name implies). These type of walkers allow for greater mobility and, surprisingly to some, more stability than one might think. One benefit of the swivel wheeled walker is that it never needs to be ‘lifted’ by the patient, just pushed. This allows it to be useful for patients with weakness in their UEs or trunk as well as for patients with balance impairments. You may see walkers abbreviated in different manners based on the clinic or facility you are working in.
-
-
- FWW: Front wheeled walker
- RW: Rolling walker
- SWW: Swivel wheeled walker
-
-
- Platform Walkers: Attachments can be added to a walker to allow a patient with an UE injury or impairment to move the walker without causing any damage to their UE condition
- Rollator: 4-wheeled with seat and hand brakes. This device provides both the user with a very mobile form of support as well as a seat to use when they become fatigued or their pain begins to increase. It is NOT to be used as a wheelchair – you may find yourself explaining that to more than one family member of the years.While any of the rolling walkers might be used for a patient with a weight bearing restriction, caution needs to be used to do so. You will need to be certain your patient understands the technique well and will not be leaning forward (and down) on the device as it is advanced – as this could lead to the device getting too far ahead of the patient.

-
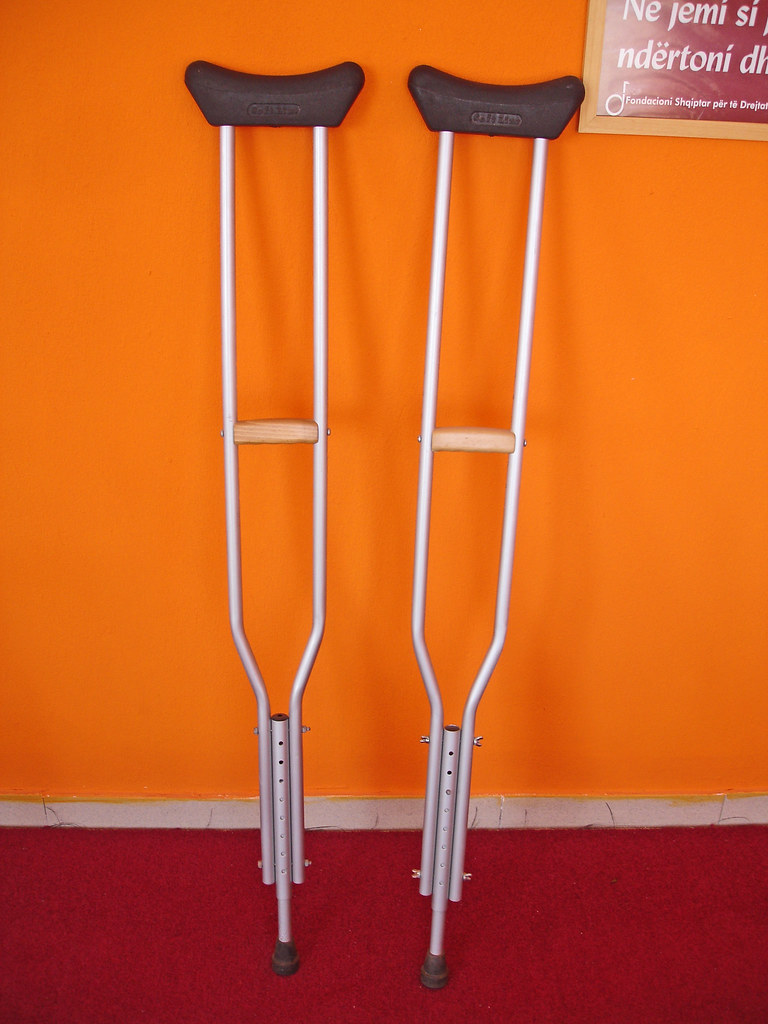
- Crutches: Crutches may be the first thing we think of when we consider Ads. However, these are much less stable than any of the walkers we discussed. So why use them? Good question. Can you think of a good answer? What can you do with a pair of crutches that you cannot do with a walker?
Right…scaling stairs (or even curbs), for example, will be much more manageable with crutches than a walker. As we will learn in class, there are a number of other functional mobility activities that crutches more readily allow for than walkers…but only for the ‘right’ patient.
- Crutches: Crutches may be the first thing we think of when we consider Ads. However, these are much less stable than any of the walkers we discussed. So why use them? Good question. Can you think of a good answer? What can you do with a pair of crutches that you cannot do with a walker?
REFLECTION: What type of patient would be considered the ‘right’ patient for using crutches? What type of patient might not be safe with crutches?
Loftstrand or Forearm Crutches: These crutch variations provide even less stability, but even more mobility. Your patient will need very good UE strength and coordination to safely use this AD.
-
- Canes:The least stable and most mobile form of AD. Canes cane be used with a number of different gait patterns; usually on one side of the body (unilaterally), but occasionally, on both sides (bilaterally). Canes are adjustable in height and come in a number of colors. The top part of a cane maybe rounded (as in a candy cane) or goosenecked (in order to have a flattop hand grip). Canes may also have different types of bottoms:
- Single point cane (SPC): Patient’s using a SPC might walk slowly and may even walk ‘one step at a time’ but will need intact balance reactions as canes are not designed for patients with serious balance impairments. Rather, canes are more often used when a patient has a unilateral LE condition (pain or weakness of a LE) or weakness at the hip. In these cases, the patient walks with a reciprocal gait pattern – one we will discuss shortly.
- Wide-based (large-based) quad cane: (WBQC). This type of base has four prongs (thus the name ‘quad’). It allows the patient to bear more weight on the device with each step. As you can imagine, the gait pattern here is similar to a standard walker: WBQC, involved LE, non-involved LE. These are used for patient’s who may need the stability of a walker, but do not have sufficient UE strength to use one.
- Narrow-based (small-based) quad cane: (SBQC). This type of base offers more support than a SPC, but less than a
- Canes:The least stable and most mobile form of AD. Canes cane be used with a number of different gait patterns; usually on one side of the body (unilaterally), but occasionally, on both sides (bilaterally). Canes are adjustable in height and come in a number of colors. The top part of a cane maybe rounded (as in a candy cane) or goosenecked (in order to have a flattop hand grip). Canes may also have different types of bottoms:

How: How to Fit an Assistive Device to your patient
We are going to transition to some visuals at this point. Please click on the following link to access your PhysioU account. You will be brought to the section within “Assistive Devices” that explains and demonstrates the proper fitting of ADs. Please note, this will be part of your skills check and lab practical. The videos are clear and succinct as well as accompanied by bullet points of important considerations.
PhysioU link: AD Fitting
AD Fitting Review:
General reminder:
Make sure your patient is standing in their best, upright posture (and not slouching on the AD). You will also want to (continuously) cue your patient to relax their shoulders when they hold or use the AD (and not hold their breath). You will appreciate these phenomena during our lab sections.
Walkers and Rollators: You will want your patient to be standing with correct upright posture, shoulders relaxed and their hands on the handgrips of the walker. In this position the elbows should be flexed about 20 – 25 degrees. If the angle is greater, than you will need to lower the walker. If the angle is lower, you will need to increase the height. Alternatively, if your patient can stand unsupported, you can place the walker in front of the patient with the patient’s arms relaxed (and at their sides). The handgrip of the walker should be at the level of the patient’s Ulnar styloid process. If not, you will adjust accordingly.
Canes: Canes can be fit in a manner that somewhat replicates the fitting of a walker. Again, use the patient’s elbow and/or Ulnar styloid process as a guide. (Elbow flexion: 20 – 25 degrees) and use the same verbal cues to your patient so they have their shoulder relaxed and their posture upright.
Crutches: It will be unlikely that you will find a therapist that loves fitting crutches for a patient. Walkers and canes are a breeze, but crutches require lots more trial and error…as well as your patience and a sense of humor. As you learn how to fit these ADs, please keep this in mind…it will help you from melting down during a lab practical😊
Reminders:
-
- The crutch tips need to be 2” lateral and 4 – 6” in front of patient.
- You need to be able to put two of your fingertips under the patient’s axilla – if not, they crutch could compress the neurovascular bundle that passes through the axilla. Compression of these nerves and blood vessels can, you will come to learn, cause the patient’s UE to “go to sleep” – a very dangerous phenomenon to occur while they walk.
- As with walkers and canes, the patient’s elbow should be flexed between 20 – 25 degrees.
Loftstrand / Forearm Crutches: You will want to fit the patient, so the cuff is about 1 – 1.5” below the olecranon process and the elbows, one again, are flexed between 20 – 25 degrees.
APPLICATION
Your elderly patient has weakness of their LUE and LLE and needs a device for ambulation. Because of their balance impairment, they cannot use a SPC. What AD might work?
Your 25 yo athletic patient has fractured their ankle. You want to provide an AD that will allow them to ambulate in and out of their home. Which device is more appropriate, a walker or crutches – and why?
Your 50 yo patient had a right total knee replacement (TKR) two days ago. They are WBAT on their RLE and need an AD to navigate around their home. Which AD would be the most stable: A FWW or Loftstrand crutches?
Self-Review: Can you now…
- Identify various types of ambulation aids?
- Describe the advantages and disadvantages of various types of ambulation aids?
- Properly fit an assistive device for a patient to promote safety, efficiency, and comfort during ambulation?
- Recognize safety factors while using assistive devices?
Gait: Unit 2 – GAIT PATTERNS
PART II: PhysioU gait pattern link
Gait Patterns:
- DESCRIBE AND PERFORM the following gait patterns:
-
- Four-point
- Two-point
- Modified Four-point
- Modified two-point
- Three-point
- Modified three-point
- Describe the ADVANTAGES AND DISADVANTAGEs of the different gait patterns.
- Competently demonstrate the INSTRUCTION of gait patterns using appropriate equipment based on various conditions
Introduction:
Just as we need to be skillful at matching a patient’s impairments to the most appropriate AD, we need to also be skillful matching the AD and Impairments to the most appropriate gait pattern. We now need to remember those ‘weight bearing statuses’ from our transfer unit as the WB status of our patient, along with their impairments, dictates the type of pattern we can use.
While you will most likely learn these patterns best by viewing the videos posted on PhysioU and practicing them in lab, let’s take a quick survey of the patterns and the important points to remember.
THE PATTERNS
- Four-point Pattern. This slow, but steady pattern requires the patient to be WBAT and use bilateral ADs (crutches, canes). The patient’s 2 legs and the 2 “points” of the ADs form the four points of the pattern…and all four points are in contact with the ground during any one step.
Four Point: Bilateral AD. WBAT. An alternative & reciprocal pattern of AD and LEs - Two-point Pattern. This is a somewhat quicker pattern that also requires the patient to be WBAT and use bilateral ADs. It is a simultaneous and reciprocal pattern of AD and LE. Two “points” are in contact with the ground during any on step. Requires intact coordination.
Two Point: Bilateral AD. WBAT. A simultaneous & reciprocal pattern of AD and LE. - Modified Four-point. This pattern requires but one AD, yet of course, continues to require the patient to be WBAT. It is slower than the next pattern in our list and is sometimes used as a transitionary pattern as the patient progresses to the modified two-point pattern.
Modified Four-Point: One AD. WBAT. - Modified two-point: This pattern is the quickest of these patterns. It use just one AD for a WBAT situation. Patient walks with a reciprocal pattern.
Modified Two-Point: One AD. WBAT. - Three-point. This pattern is used for patients who are NWB’g on one of their LEs. They will use either a walker or crutches for this pattern: Always a bilateral AD; never unilateral AD.
Three-Point: Bilateral ADs. NWB’g - Modified three-point. This pattern is used for PWB’g situations and always requires bilateral ADs. Care must be used with this pattern as patient’s may put more weight on their LE than is permitted. This is a big precaution and one to remember!
Modified Three-Point: Bilateral ADs. PWB’g
REFLECTION:
You have just fallen and twisted your ankle. You have been told not to not put any weight on your ankle. What is your weight bearing status?
What gait pattern will you use and what type of AD will be required?
What if you feel because you have a mild case of vertigo which is impairing your balance? What AD might you choose instead and why?
Gait: Unit 3 – GAIT TRAINING
So now the fun begins: The privilege and opportunity to help another human being get on their feet and begin their journey towards greater independence. Maybe this will be the first time they have ever walked or maybe this will be the first time since their injury, illness, or surgery. or walk. In any event, this will be an event for your patient: One they may be eagerly anticipating or ‘un-eagerly’ dreading.
REFLECTION:
- Please put yourself in your patient’s position for a moment.1.What types of question or concerns might you have if this is to be the first time you will try walking since your injury, illness or surgery? As you think of questions, allow those questions to prompt other questions. Please take a moment to write these down (you will need these to complete the lab worksheet at the end of this section).
- How might these questions effect your emotions?
- Your ‘focus’ and your concentration?
- How might this information help you as a clinician?
- Finally, ask questions 1-3 of your lab partner, a family member or friend. The answers might surprise you and might help you can a clearer picture of just how significant your role will be in your patient’s life.
PRE-GAIT ACTIVITIES AND EDUCATION
If we continue to apply the principle of ‘beginning at the end’ with our gait training, it is safe to say that the ‘end’ we seek is for our patient to ambulate, regardless of the distance, safely. We want our patient to understand:
- Their role in the attempt: The technique they are to use to ambulate, how to communicate their needs during the activity, when they are to start or stop, etc.) as well as
- Our role in their attempt: What manual and verbal cues we may use, where we will stand, how much assistance we will provide, how we will protect them, etc.
To accomplish these goals, it will require, as with all of the skills you have learned this semester, preparation. Preparation of yourself, the environment and of your patient.
You as the Clinician
Your first step in the preparation process will be to review the patient’s medical record. You will pay close attention to the PT Plan of Care. In that part of the medical record you will learn:
- Your patient’s HPI (the History of their Present illness – how they were injured or became ill)
- Diagnosis
- PMH (past medical history)
- Co-morbidities.
- Medications
- Weight Bearing Status
- Physical and Cognitive Impairments
- Equipment needs
- Level of assistance required for functional mobility activities (bed mobility, transfers and gait)
- Their ambulatory status: Level of assistance required, AD used, weight bearing status, distance they ambulated during the initial PT evaluation, and gait deviations that were present, how their vital signs responded to the gait activity as well as any number of other patient-specific considerations.
The Environment:
While assessing an environment will become second nature to you, at this point it might be helpful for you to use (or create) a checklist. One that would address:
-
- The space. Is the space adequate for gait training? Is there room for the patient, their AD, yourself as well as any other items you will need (perhaps a second therapist; perhaps another chair for the patient to walk to and then sit in; perhaps the patient’s wheelchair).
- Wheelchair: If you are using a wheelchair, are the footrests out of the way; are the brakes engaged; are the castor wheels (the little ones in the front of the chair) turn in the correct direction and out of the way of the AD); if you will be have someone follow you with the wheelchair, do they know how to lock and unlock the chair and how close to follow you.
- Flooring: Is the floor free of cords and clutter; is it clean and dry; are there areas when the surface changes (carpet to linoleum for example); are the thresholds flush or, in not, are they secure; are there any anomalies in the flooring (loose boards, uneven areas)
- Lighting: Is the lighting appropriate for the patient and the training: Some patients have light sensitivity – dimmer lighting works better. Some patients see poorly in the dark and need all possible lights to be turned on. Is there glare coming in from a window or other source? Is the lighting the same throughout the area you will be completing your gait training?
- Patient’s Attire: Is the patient wearing appropriate footwear: Footwear that will not slip, cause instability or fall off with ambulation. Is the patient’s clothing secured: If they are in a hospital gown, is the back tied; if they are in pants, are they secured?
- Patient’s Appliances: If the patient has any catheters, tubes or lines, have you planned for them? Do any need to be disconnected? How will you manage those that cannot be disconnected?
- Equipment: Everything from proper PPE to use of a gait belt. Always do a double check of your equipment after fitting to ensure that the device is safe.
- Assistance: If you will be working with another therapist, make certain that you each know your roles and how to communicate with each other.
The Patient:
Your pre-treatment interview, while helpful for you, will be an important element in creating a safe gait training experience for your patient. At this time you will complete the typical steps to any treatment: Introduction with your title, a general explanation of the intended therapy interventions and a request for their consent to treatment. You will then move into, as with transfers, your more detailed instructions and demonstrations. During this time, you will be asking the patient not only if they understand your directions, but if they have any concerns or questions. This process will provide you with value clues as to how best to provide your instructions (verbal, visual, manual), what type of support your patient may need (physical, emotional) as well as their level of cognition. All of this is essential for providing a safe gait training experience.
ANTICIPATE and AVOID:
Your review of the medical record as well as your patient interview will allow you to anticipate what types of ‘untoward’ (unfavorable) responses your patient (given their particulars) may exhibit. Just a few examples of these responses may include:
- Orthostatic hypotension
- Increased pain
- Inability to maintain correct weight bearing
- Syncope
- Difficulty managing their appliances
- Increased fear
- Inability to follow instructions
- Increased impulsivity
- Etc.
This may be an appropriate time to add that we, as clinicians, can sometimes get a little overzealous with our patient as they begin their gait training. We might think, ‘Wow, look how good they are doing. Let’s see if they can walk to the doorway AND all the way back’. Maybe that will be fine…but just a word of caution: It is better to undershoot in the beginning than overshoot.
“Are we there yet?”
So now that our preparations are complete, it is time transfer our patient from sit to stand so we can begin our gait training. Please view the techniques we will use for sit to/from stand on our PhysioU app. Here is the link: Sit to and from Standing You need to be competent with:
- Sit to / from stand using a bilateral (axillary crutches and walkers) or unilateral ADs
- Sit to/from stand with WBAT, PWB’g and NWB’g status
As you view the videos, be mindful of how each weight bearing status and AD has its own indications, precautions and techniques.
Guarding:
Once your patient is in standing and you have snugged their gait belt, you are about to take your first steps. At this point, your body mechanics and use of your body become critical in providing a safe experience for your patient. Can you think of some principles from body mechanics that might be useful?
Please view the PhysioU section regarding gait guarding: Gait guarding overview and technique
In addition to positioning yourself on the patient’s ‘involved’ side (obliquely on their side and slightly behind), you will want to keep your base of support wide and your center of gravity low. You will be holding the gait belt with an under-grip and, with our free hand, be able to support your patient at their shoulder or with advancing their AD. You need to be close enough that you can manage the patient if they were to lose their balance, but not so close that you are in their way.
As the patient ambulates, you will be attentive to their posture: Are they observing where they are going or looking at their feet? How about you: Are you just looking at their feet or your eyes attentive to your environment, your patient and your pathway? Are you scanning for any changes in the environment (other patients or therapists entering your walkway, etc.)? Safety requires you to continuously be changing your gaze and to continuously stay focused on the task at hand.
STAIRS:
While it may be a victory for your patient to be able to walk on a level surface, many times that isn’t enough to reach the ambulatory goals. Often, gait training of curbs and steps will be necessary on order for your patient to return to their home. Many of the same principles from guarding on level surfaces apply here, but there are a few unique to the steps.
Please view the PhysioU app videos on stair training for using the various ADs and with the various weight bearing statuses. Gait training on stairs
At this point you will want to memorize the following and be able to explain to your instructor (in medical-speak) and to your patient (in patient-speak) “why” we it is important to perform gait training on stairs in this manner.
“Up with the good; down with the bad”
Going Up: The uninvolved LE ascends step first f/b involved LE.
Going Down: The involved LE descends step first f/b uninvolved LE.
Lab Work Sheet for class:
- Please put yourself in your patient’s position for a moment.
What types of question or concerns might you have if this is to be the first time you will try walking since your injury, illness or surgery? As you think of questions, allow those questions to prompt other questions. Please take a moment to write these down (you will need these to complete the lab worksheet at the end of this section).How might these questions effect your emotions?Your ‘focus’ and your concentration?How might this information help you as a clinician?Finally, ask questions 1-3 of your lab partner, a family member or friend. The answers might surprise you and might help you can a clearer picture of just how significant your role will be in your patient’s life. - Why do does a patient descend steps with their involved leg first:
- What would happen to a patient if the ascended the steps with their involved LE first?
- Your patient is NWB’g on their RLE. You are about to guard them for gait training. Which side to you stand on and why?
- Your patient is about to stand up from their chair and ambulate with a FWW. Where do they put their hands during the process of moving from sit to stand and why?
- How does a review of the medical record lead to a safer gait training experience – please include at least one example to support each of your reasons.
- Your patient is very anxious about their gait training: They are PWB’g RLE and they are afraid they will fall because they are not able to bear all of their weight on their RLE. Which AD would be the most stable and the safest for this situation and why?
